Ever wonder how to make a realistic-looking fleshwound with stage make-up? With Halloween coming up and Cons all over the place, I'm here to help you out. Let's make a bullet hole! Click on any of these images to see them bigger. Here's what you'll need:
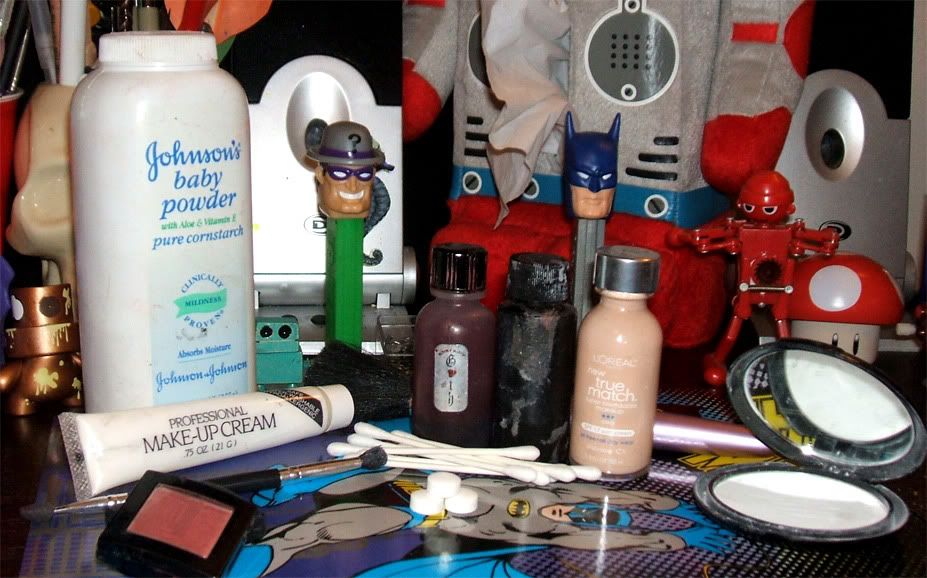
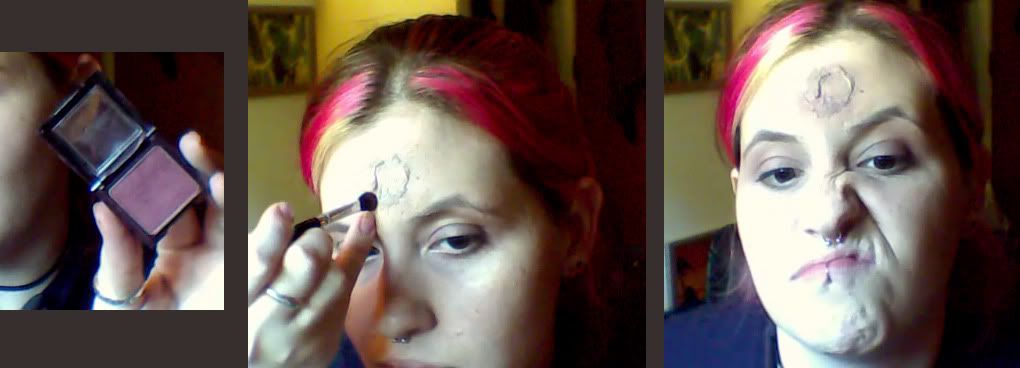
baby powder, dark pink/red powder make-up, blue cream make-up, fake blood, liquid latex, cotton swabs, make-up that matches your skin tone, tissues, aspirin pills, and applicators.
Step One -
With the liquid latex, spread a thin layer over the area of skin you will build the actual "hole" on. Then, using either pulled-apart cotton swabs/balls or tissue, dip small shreds into the liquid latex, and press into a the shape of a circle around the specified area:
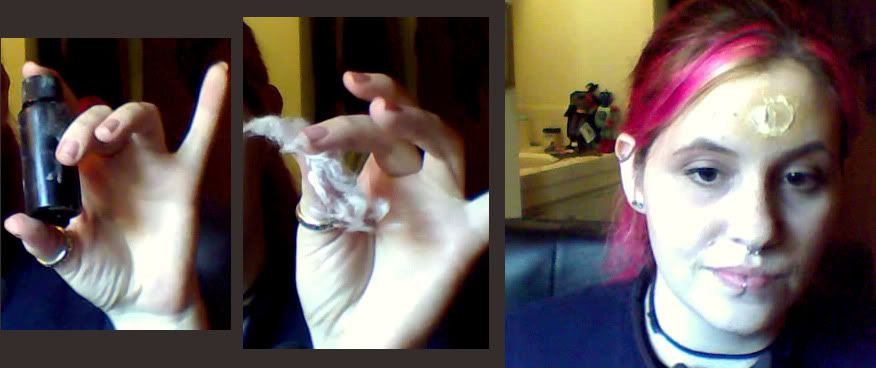
With the liquid latex, spread a thin layer over the area of skin you will build the actual "hole" on. Then, using either pulled-apart cotton swabs/balls or tissue, dip small shreds into the liquid latex, and press into a the shape of a circle around the specified area:
Step Two -
With a blush brush, dust the area with baby powder to set and dry the latex. Next, sponge on foundation make-up to match the color of the latex with your skin tone.
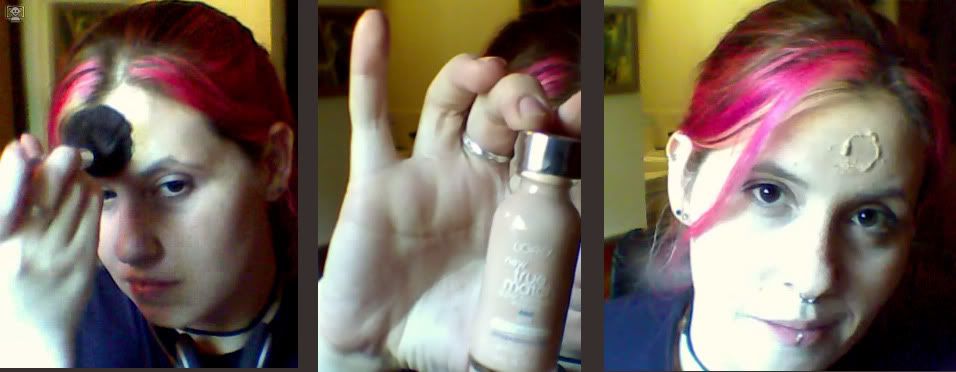
With a blush brush, dust the area with baby powder to set and dry the latex. Next, sponge on foundation make-up to match the color of the latex with your skin tone.
Step Three -
Using the blue cream paint, sponge and blend a tiny bit of blue around the sides of the edges of the ring:
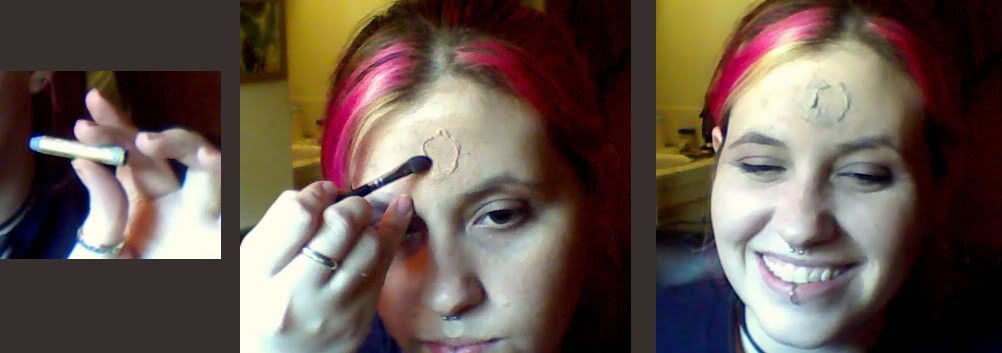
the reason for this being that when your skin breaks, so do the blood vessels around that break, causing bruising. same with the next step
Using the blue cream paint, sponge and blend a tiny bit of blue around the sides of the edges of the ring:
the reason for this being that when your skin breaks, so do the blood vessels around that break, causing bruising. same with the next step
Step Four -
Repeat the same thing with the dark pink/red powder:
Repeat the same thing with the dark pink/red powder:
Step Five -
Next, we're going to coat this entire area in fake blood. Now, the fake blood is VERY important. A lot of brands stay sticky and wet, and also have either an orange or pink tint. This is BAD. If there's one thing I've learned in years of organizing zombie events, it's where to find the best fake blood. Bloody Mary's "Vampire Blood" not only stays in the deep red range, it coagulates and dries like real blood (I'm totally realizing how creepy this truly is right now). For this, grab a cotton swab, drown it in fake blood, and spread it within the circular area:
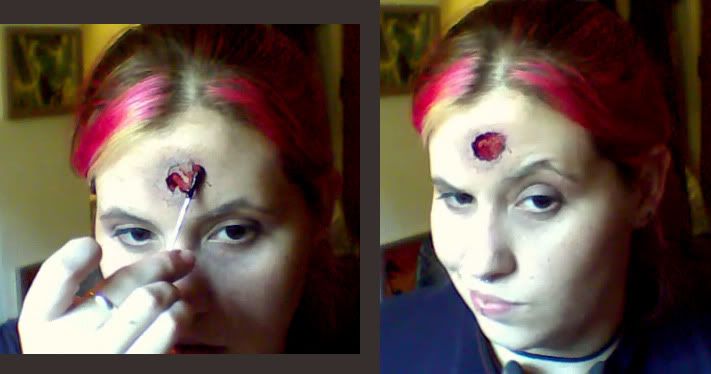
Next, we're going to coat this entire area in fake blood. Now, the fake blood is VERY important. A lot of brands stay sticky and wet, and also have either an orange or pink tint. This is BAD. If there's one thing I've learned in years of organizing zombie events, it's where to find the best fake blood. Bloody Mary's "Vampire Blood" not only stays in the deep red range, it coagulates and dries like real blood (I'm totally realizing how creepy this truly is right now). For this, grab a cotton swab, drown it in fake blood, and spread it within the circular area:
Step Six -
Here's the fun part. Remember that hammer we used in the banana making post? Let's bust that out again. Those random aspirin pills in our list of ingredients.. we're going to put those in a ziploc bag, and crush those up with the hammer. These will be used to push into the inside walls of the fake wound to look like bone fragments. This will stick right to the blood and latex:

Here's the fun part. Remember that hammer we used in the banana making post? Let's bust that out again. Those random aspirin pills in our list of ingredients.. we're going to put those in a ziploc bag, and crush those up with the hammer. These will be used to push into the inside walls of the fake wound to look like bone fragments. This will stick right to the blood and latex:
LAST Step -
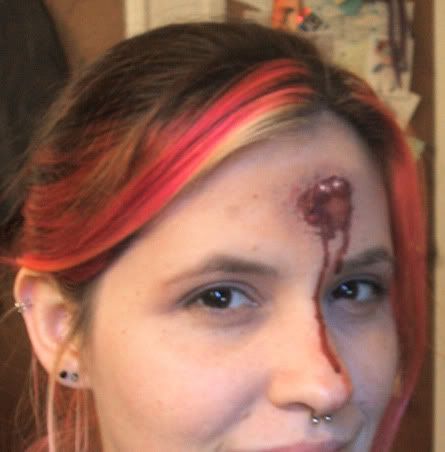
With the fake blood, water it down just a bit to make it nice and drippy, bust out the cotton swabs one more time, and dab the sodden cotton swab inside the wound until it drips down. Let this drip as much or little as you'd like:

With the fake blood, water it down just a bit to make it nice and drippy, bust out the cotton swabs one more time, and dab the sodden cotton swab inside the wound until it drips down. Let this drip as much or little as you'd like:
AND THERE YOU HAVE IT. A realistic-looking fake wound to freak out whomever you'd like.
Have any suggestions or requests for DIY Saturdays? Leave them in the comments, and we'll put them on the list! And here's a link to that little video blurb for this post. Go scare your co-workers!
♥ Jackie
Ooo, spooky! I'm totally going to make my kids go as Zombie Teletubbies this Halloween!! = )
ReplyDeleteHahaha.. Zombie Teletubbies would be AMAZING!!
ReplyDeleteI'm contemplating being a zombie girlscout for Halloween! Yay! Though, I am completely inept. How do I create a bite mark?
ReplyDeleteJackie. You=Bees Knees.
This is awesome! I was wondering about this just the other day after all the cons that have passed. Its something thats "easy" enough that I could actually do it and not flub up too badly.
ReplyDeleteHow long does it take for the drying and from beginning to end (on avg)?
Lixx - The trick with using baby powder dries it pretty much instantly [the liquid latex, that is].. the rest that goes on there is pretty much the same consistency as regular make-up.
ReplyDeleteWhen I did this, i actually did it as a video.. the reason I didn't post it as a video is because I got distracted by some important texts during the process, and it still took right around 20 minutes.
Cranial - Oddly, i was actually thinking about adding an addendum to this about creating bitemarks earlier today.. because they're REALLY similar.
ReplyDeleteUse the same steps as this - the only difference is, when making the rings.. make more of an oval (upper jaw, and lower jaw) shape, with thicker pieces of cotton, soaked thoroughly in liquid latex. While the shape is still wet, use something to indent around the oval like teeth marks (just take a look at what you have around.. you can easily use one end of tweezers, or a similar shape to do this).
..and then, of course.. don't add blood along the entire inside. However, a tiny bit of blood dripping from a few of those indent marks would be pretty wicked.